Complete Guide to External Wall Insulation for UK Homeowners

Niket Kapur • 28 April 2025

Introduction 


Insulating your home’s external walls – whether from the outside (external insulation) or from the inside (internal insulation) – can dramatically reduce heat loss, improve comfort, and make your home more energy efficient. This guide provides a detailed, practical explanation of external wall insulation (EWI), internal wall insulation (IWI), and hybrid approaches, covering types of materials, finishes, installation methods, and key considerations for homeowners. 


Why Insulate Your External Walls? 


Lower Energy Bills 

Proper insulation significantly reduces the amount of heat escaping from your home, lowering your heating costs by hundreds of pounds annually. 


Improved Comfort 

Insulated walls eliminate cold spots and draughts, maintaining an even, comfortable temperature throughout your home. 


Protection Against Damp and Mould 

Keeping masonry walls warmer reduces the risk of condensation and mould formation. Breathable insulation systems can further protect against moisture issues. 


Enhancing Appearance 

External wall insulation often refreshes the external look of a property, allowing for new finishes like renders or brick slips. 


Increasing Property Value 

Energy-efficient homes are increasingly desirable. Improved EPC ratings and enhanced aesthetics can add value. 


Soundproofing and Fire Safety 

Certain materials, such as mineral wool, provide excellent soundproofing and fire resistance. 


Preparing for Future Heating Systems 

With the rise of low-temperature heating systems like heat pumps, a well-insulated home is crucial for efficiency and comfort. 


External vs Internal Wall Insulation: 


An Overview 


External Wall Insulation (EWI) 


  • Applied to the outside of the home. 


  • No internal disruption. 


  • Preserves indoor space. 


  • Refreshes external appearance. 


  • Requires scaffolding and possible planning considerations. 


Internal Wall Insulation (IWI) 


  • Applied to the inside walls. 


  • Can be installed room-by-room. 


  • Reduces internal space slightly. 


  • Preserves external appearance. 


  • Requires redecoration and careful moisture management. 


Hybrid Approach 


  • Combines external insulation where possible and internal where necessary.


  • Useful for heritage properties or conservation areas.  Also useful where area close to external wall is restricted size for example a shared walkway. 


External Wall Insulation (EWI) 


How It Works 


Insulation boards (e.g., EPS, mineral wool, phenolic) are fixed to external walls, covered with reinforcement mesh and finished with render, brick slips, or cladding. 


Benefits 


  • Eliminates thermal bridging. 


  • Protects the existing structure. 


  • Greatly improves thermal performance. 


Access and Planning 


  • Scaffolding needed. 


  • Planning permission may be required, especially in conservation areas. 


Structural Considerations 


  • Walls must be sound. 


  • Damp-proof course must be respected. 


Common Insulation Materials for EWI 


Expanded Polystyrene (EPS) 


  • Affordable, lightweight, good insulation value. 


  • Fire risk: must be rendered and protected. 


Mineral Wool 


  • Non-combustible, breathable, excellent fire and acoustic performance. 


  • Heavier and more expensive than EPS. 


Phenolic and PIR Boards 


  • High insulation values (thin boards). 


  • Moderately fire-resistant but combustible. 


Wood Fibre 


  • Breathable, eco-friendly. 


  • Requires thicker applications and careful detailing. 


Finishes for External Insulation 


Render 


  • Acrylic, silicone, or mineral renders. 


  • Range of colours and textures. 
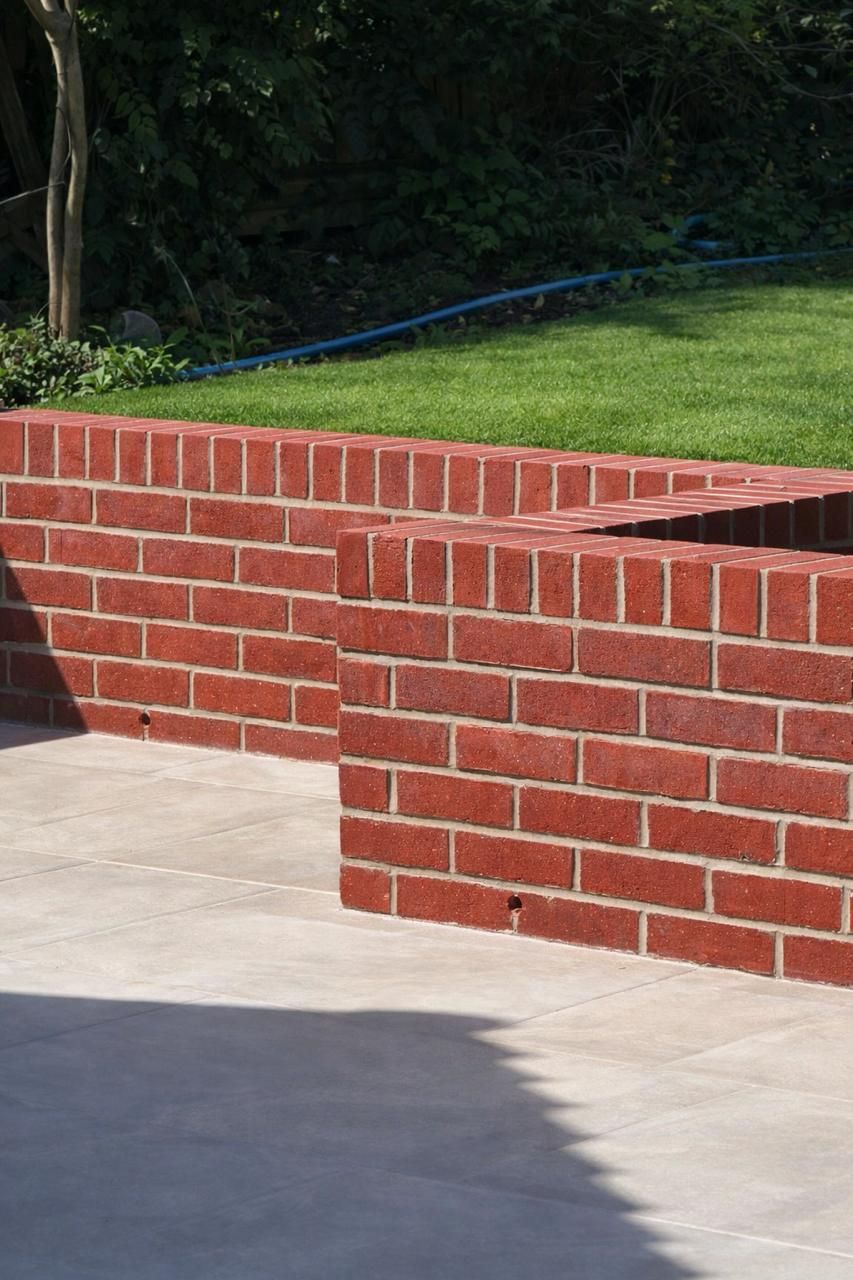

Brick Slips 


  • Thin slices of real brick.   


  • Maintain traditional appearances.


  • Acrylic faux brick often used. 


Cladding 


  • Timber, composite, or metal finishes. 


  • Installed on battens with ventilated cavities. 


Mixing Finishes 


  • Common to combine finishes (e.g., render with brick slips for front facades). 


Installation Process for External Wall Insulation 


  1. Survey and preparation. 


    2.  Fixing insulation boards. 


    3. Applying reinforcement mesh and basecoat. 


    4.  Applying the final finish (render, brick slips, cladding). 


    5. Refixing external fixtures (pipes, lights, alarms). 


    6. Final inspection and handover. 


Internal Wall Insulation (IWI) 


How It Works 


Insulation is added to the internal face of external walls, finished with plasterboard. 


Suitable Situations 


  • Where external changes are prohibited. 


  • Room-by-room renovations. 


Types 


  • Rigid insulated plasterboards. 


  • Stud wall systems with mineral wool or PIR infill. 


Moisture Management 


  • Vapour barriers or breathable materials essential to prevent condensation. 


Installation Process for Internal Insulation 


  1. Clear and prepare rooms. 


    2.  Apply insulation (dot-and-dab, mechanical fixings, or stud walls). 


    3.   Install vapour barriers if needed. 


    4.   Finish with plasterboard and skim. 


    5.   Redecorate and refit fixtures. 


Combining External and Internal Insulation (Hybrid Approach) 


When Appropriate 


  • Conservation areas. 


  • Tight boundaries. 


  • Specific aesthetic requirements. 


Advantages 


  • Maximises insulation coverage. 


  • Preserves important facades. 


Challenges 


  • Careful design at junctions. 


  • Moisture management essential. 


Comparing Insulation Options


Summary Table


EWI with EPS


Key benefits:  Cost-effective, good thermal performance

Drawbacks:    Fire risk if not detailed correctly


EWI with Mineral Wool


Key benefits:  Non-combustible, breathable

Drawbacks:    More expensive and heavier


EWI with Phenolic/PIR


Key benefits:  Very thin, excellent insulation

Drawbacks:    Combustible, costlier


EWI with Wood Fibre


Key benefits:  Breathable, eco-friendly

Drawbacks:    Thicker walls, specialist installation


Internal Wall Insulation


Key benefits:  Maintains external appearance, can be phased

Drawbacks:    Reduces room size, condensation risk


Hybrid


Key benefits:  Best performance + appearance

Drawbacks:    Complex design, higher initial cost


Conclusion: The Importance of Proper Wall Insulation 


Wall insulation is vital for reducing heat loss, cutting energy bills, improving comfort, and futureproofing homes against rising energy costs and regulatory changes. 

It is especially critical when installing low-temperature heating systems like heat pumps, which work most efficiently in well-insulated homes. Without adequate insulation, a heat pump may struggle to maintain temperatures and may consume more electricity than necessary. 

Done properly, wall insulation (external, internal, or hybrid) is a one-off investment that will enhance your home’s warmth, value, and energy efficiency for decades to come. 

Always engage qualified professionals, ensure certified systems are used, and address moisture management carefully. With the right approach, your home will be more comfortable, greener, and ready for the future. 


And finally … 


This guide is for general installation.  Do rely only on your specialist adviser’s and installers.  Each site is unique. 


The Building Guidance Partnership 

www.thebgp.co.uk 

+44 (0)20 8076 3110 


by Niket Kapur 18 January 2026
A practical, expert-led reference for homeowners who want to understand what "good" really looks like Introduction: How Good Is Your Paint Finish – Really? How good is your paint finish? Do you actually know what to look for? Most homeowners only notice paint when it is obviously wrong: peeling, flaking, or badly discoloured. But the difference between an average paint job and a truly high-quality one lies in subtle details that are easy to miss unless you know what to look for. This guide is designed to change that. Before your next site visit, try this simple exercise: Look closely around light switches, plug sockets, and door frames. Step back and then move closer to the centre of a wall. Stand to one side and let light rake across the surface. Do you see brush marks? Uneven sheen? Slight ripples, ridges, or texture? Do lines at the ceiling feel crisp, or do they wander slightly? These are not accidents. They are the direct result of preparation, materials, tools, and technique. Once you understand what causes them, you begin to see paintwork differently and you begin to appreciate what real quality looks like. 1. Understanding Common Paint Imperfections (What to Look For) Brush Marks and Picture Framing Often visible around switches, sockets, edges, and corners. These occur when: Paint is applied too thickly Poor-quality brushes are used Edges are not blended properly into rolled areas Roller Texture ("Orange Peel") A slightly stippled surface resembling the skin of an orange. Caused by roller nap length, pressure, paint viscosity, and technique Not inherently wrong but undesirable if a glass-smooth finish is expected Lap Marks Visible bands or overlaps where paint has dried unevenly. Caused by not maintaining a "wet edge" Common on large walls and ceilings Flashing Areas that appear patchy or change sheen depending on light angle. Often due to uneven priming or inconsistent paint absorption Wavy or Crooked Ceiling Lines The ceiling and wall may not be straight — but the eye expects them to be. Professionals "create" straight lines visually, even where none exist 2. Surface Preparation: The Foundation of Every Great Finish Excellent paintwork is built, not applied. Cleaning Remove dust, grease, and residue Kitchens and bathrooms often require degreasing Paint sticks poorly to contamination Sanding Walls: light sanding to flatten imperfections Woodwork: progressive sanding (coarse → fine) Always remove dust thoroughly (vacuum + tack cloth) Filling and Repairs Cracks, nail holes, and joints must be filled, sanded, and feathered Poor filling shows through even multiple coats Priming Essential for bare plaster, timber, metal, and stained areas Evens absorption and prevents flashing Specialist primers exist for stains, damp, knots, and metals 3. Paint Types Explained (And When to Use Them) Emulsion Finishes Matt: Hides imperfections, less washable Durable Matt: Better cleanability, modern favourite Eggshell / Satin: Slight sheen, more robust Silk: Reflective, shows imperfections easily Water-Based vs Oil-Based Water-based: Fast drying, low odour, flexible Oil-based: Longer open time, smoother finish, harder wearing (now increasingly replaced by advanced water-based alternatives) Specialist Paints Stain-blocking paints (water marks, nicotine, tannins) Damp-resistant coatings (after moisture issues resolved) Mould-resistant paints (bathrooms, kitchens) High-durability/washable paints (hallways, family homes) 4. Metal Paints and Functional Finishes Radiators and Metalwork Require heat-resistant or metal-specific paints Prevent rust and discolouration Applied thinly to avoid obscuring detail Railings and Exposed Steel Primer + metal topcoat system essential Corrosion protection is as important as appearance 5. Brushes Explained: Why Quality and Type Matter Brush Types Synthetic bristles: Best for water-based paints Natural bristles: Traditionally for oil-based paints Angled (sash) brushes: Precision cutting-in Fine finishing brushes: Doors, trims, cabinetry Why Good Brushes Matter Hold paint evenly Release paint smoothly Reduce visible brush marks Improve edge control Cheap brushes create work. Good brushes create results. 6. Rollers Explained: Nap Length and Finish Quality Nap Length Short nap: Smooth walls, fine finishes Medium nap: General walls and ceilings Long nap: Textured surfaces Foam Rollers Ideal for cabinetry, doors, and ultra-smooth finishes Leave minimal texture Often used to "tip off" after brushing 7. Application Techniques That Separate Average from Excellent Thin, Multiple Coats Thick paint creates ridges and texture Thin coats level better and cure properly Thinning and Diluting Paint Water-based paints can sometimes be lightly diluted Improves flow and levelling Essential for spraying and fine finishing Always follow manufacturer guidance Maintaining a Wet Edge Work methodically Overlap into still-wet paint Prevents lap marks and flashing Sanding Between Coats Light sanding removes dust nibs and imperfections Creates a professional, refined finish 8. Cutting-In and Creating "Straight" Lines Walls and ceilings are rarely straight — but paint lines must appear so. Professional Techniques High-quality angled brush Controlled paint loading Slow, deliberate strokes Visual alignment rather than following the plaster Aids Wide filling knife or paint shield (used carefully) Light sanding of edges between coats This is craftsmanship, not masking tape. 9. Visual Tricks Used by Experienced Decorators Unifying Colour Painting walls and ceilings the same colour in lofts or awkward spaces Reduces visual breaks and enhances perceived space Black Paint for Disappearance Behind radiator covers In shadow gaps Inside pocket-door frames Creates visual depth and invisibility Stripes and Orientation Vertical stripes: Increase perceived height Horizontal stripes: Increase perceived width (Used sparingly in residential settings) Subtle Ceiling Lightening Ceiling slightly lighter than walls for openness Avoids harsh contrast lines 10. Inspection: How Professionals Check Their Own Work • Inspect under natural light • Use raking light or work lamps • Check from multiple angles • Touch up imperfections immediately Paintwork should pass inspection before furniture hides it. 11. A Brief Note on External Paints This article focuses on interior finishes, but it is worth noting that external painting is a specialist discipline in its own right. Exterior paints are designed for: UV resistance Moisture control Temperature movement Algae and mould resistance They require different preparation, systems, and maintenance strategies. Conclusion: Paint as a Craft, Not a Commodity Great paintwork is not about brand names or colours alone. It is the result of: Careful preparation Correct materials The right tools Patience Technique refined over time Once you know what to look for, you will never see paint the same way again — and that is exactly the point. If you're managing a build or renovation and want expert guidance on achieving — and maintaining —professional standards throughout your project, contact The Building Guidance Partnership for a no-obligation consultation at thebgp.co.uk/contact .
by Niket Kapur 17 September 2025
The Assumption Many homeowners feel confident they already have a “good builder.” Often this is someone recommended by friends, family, or colleagues. But what worked for someone else’s project may not suit your project. Builder selection is the single most critical step in any renovation or rebuild. Done carefully, it leads to a smooth build. Done poorly, it can cause budget overruns, stress, and disputes. Why Proper Vetting Matters Most builders are hardworking professionals, but homeowners often don’t carry out the right checks. Some unscrupulous operators may show finished projects or photos that were not their own work. Looking only at glossy, finished results is misleading - poor workmanship can be hidden behind plaster or paint. Without proper vetting, even well-meaning builders can be mismatched to the size, style, or complexity of your project. This is why vetting is not about being suspicious - it’s about protecting your investment and ensuring the builder you choose is the right fit. How to Vet a Builder Properly Look backwards: Review a project the builder completed at least five years ago. Speak to those property owners to see how the work has lasted over time. Look forwards: Visit a current live site. See how it’s managed day to day, how organised it is, and how safety is handled. Speak with current clients: Ask how easy and flexible the builder is to work with. Do they communicate clearly? Are they responsive to changes? Check references: Speak directly with at least two or three previous clients - don’t rely only on written testimonials. Verify insurances: Public liability, employer’s liability, and contract works cover are essential. Verify financial stability: Review the builder’s company structure and trading history. A builder under financial strain poses a risk to your project. Review documents: Are quotes and specifications detailed, or are they vague one-liners? Are they willing to work under a proper written contract? Confirm who does the work: Will the builder’s own team deliver it, or will it be subcontracted to unknown trades? Common Red Flags While most builders are professional, there are signs to be cautious of: Requests for a large deposit before work starts. Vague or one-page quotes with no detail. Reluctance to provide insurance certificates or references. “Too good to be true” pricing. Unwillingness to agree to a clear written contract. These are not criticisms of builders as a whole - they are practical safeguards to avoid risks. Case Study: From Risk to Confidence A homeowner in North London chose a builder based solely on a personal recommendation. The quote was vague, no insurance documents were requested, and the photos shown turned out not to be from the builder’s own projects. Within weeks, disputes arose over extras and workmanship. The BGP stepped in, carried out due diligence, and sourced an alternative builder who was properly insured, experienced, and well-matched to the project. “The BGP's process gave us clarity and confidence. The new builder was organised, insured, and easy to work with - the project turned around completely.” Why Professional Guidance Saves More Than It Costs At The Building Guidance Partnership, we don’t criticise builders - we partner with the right ones. Our due diligence ensures the builder is properly matched to your project. With this approach, homeowners typically save multiples of our fee through: Avoiding inflated extras. Preventing costly delays. Ensuring lasting build quality. Recovering VAT correctly. Reducing disputes with clear specifications and contracts. Take Control of Your Build Selecting the right builder is the single most important decision you’ll make.  Book a free 20-minute consultation with The Building Guidance Partnership today. We’ll help you carry out due diligence, protect your investment, and ensure your project runs smoothly. The Building Guidance Partnership Telephone (020) 8076 3110 WhatsApp +44 7507 705376 www.theBGP.co.uk
by Niket Kapur 14 September 2025
The Temptation Many homeowners are tempted to manage their own building project. The logic seems simple: cut out the cost of a project manager and save money. You already have a builder lined up, maybe one recommended by friends or family, and you feel confident that everything will go smoothly. But while it can work, managing your own build is a serious undertaking. Without preparation, it often leads to stress, delays, and costs spiralling out of control. What Project Management Really Involves Managing a build is not just about choosing finishes or chasing invoices. It requires: Coordinating multiple trades and suppliers. Handling schedules, deliveries, and staged payments. Ensuring compliance with building regulations. Managing risks, safety, and insurances. Keeping accurate specifications, contracts, and records. Even with a good builder, these tasks can overwhelm a homeowner. The Pitfalls to Watch For (Even with a “Good Builder”) Many people believe that because their builder is: “Tried and tested,” or Recommended by friends and family, … everything will go smoothly. Unfortunately, things can still go wrong. Hard to judge quality: Finished projects can look impressive, but hidden corners may have been cut. It is difficult for a homeowner to spot these issues. Knowledge untested: We rigorously test builders’ knowledge. Many homeowners do not - and miss key warning signs. Due diligence matters: We check business history, insurances, and financial standing. This step is often skipped, leaving clients exposed. Technical gaps: Homeowners often lack expertise in dealing with party wall agreements, public liability, and specialist insurances - all of which are critical to staying compliant and protected. The Benefits of Doing It Yourself To be fair, there are reasons why some homeowners still choose to self-manage: Potential savings on professional fees. Personal satisfaction from being hands-on. Full control over decision-making. Direct relationships with trades. For some, this works well - but only when they have time, knowledge, and systems in place. Case Study: From Chaos to Control A homeowner in Harrow decided to manage their own large extension. They trusted a builder recommended by family and assumed things would run smoothly. Within months, delays mounted, trades clashed, and costs increased as “extras” piled up. We were brought in to coach them through the rest of the project. With clear payment schedules, proper contracts, and regular reviews, they regained control. Why Professional Support Pays Off At The Building Guidance Partnership, we provide coaching for homeowners who want to take charge - and full project management when required. Either way, our involvement saves clients far more than our fees. 💡 With professional project management, clients often save multiples of the project management costs through: Better build quality – avoiding mistakes and rework. Preventing inflated builder extras. Reducing timing delays that push up costs. Correctly recovering VAT and council tax where applicable. Avoiding disputes by using clear, pre-agreed specifications and contracts. Take Control - With the Right Support Self-managing a build can be rewarding - but it is not for the faint-hearted. With the right coaching, you can avoid pitfalls, protect your budget, and finish your project with confidence. Book a free 20-minute consultation with The Building Guidance Partnership today. Let us help you decide if project managing your own build is the right choice - and give you the tools to succeed.