Site Safety 101 - Hoarding, CDM Duties & Protecting Your Family

Niket Kapur • 10 August 2025

Renovating or building at home can be exciting, but it also brings hazards. Power tools, dust, heavy machinery, and open excavations can quickly turn a dream project into a dangerous environment if not properly managed.


Site safety is not just about protecting workers - it is about safeguarding you, your family, your neighbours, and the public. Many homeowners underestimate their role in safety, assuming it is purely the builder’s responsibility. In reality, under UK law, you have legal duties too.


Why Site Safety Matters


A safe site:


  • Prevents accidents and injuries.


  • Keeps your project on track by avoiding shutdowns or investigations.


  • Reduces the risk of costly claims or disputes.


  • Demonstrates professionalism to neighbours and the wider community.


Beyond these practical benefits, safety is also a legal obligation. The Construction (Design and Management) Regulations 2015 (CDM 2015) set out duties for clients, contractors, and designers - and yes, you, as the homeowner commissioning the work, are a “client” under these rules.


Practical Steps for a Safe Site


  1. Secure the Perimeter


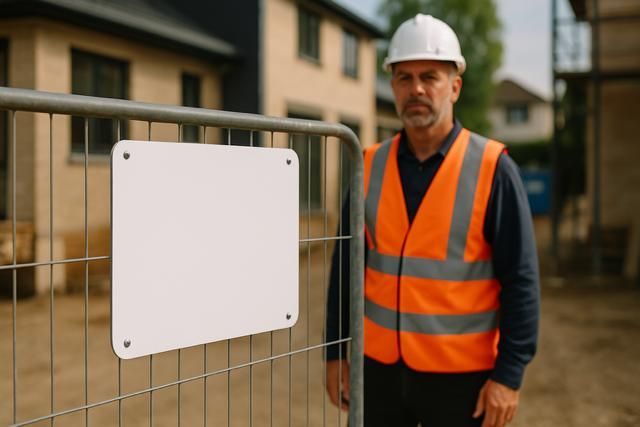
  • Hoarding: Use solid hoarding or strong fencing to enclose the site. This prevents unauthorised access, especially by children or curious passers-by.


  • Clear Signage: Install warning signs (e.g., “Construction Site - Keep Out”) and safety notices for deliveries.


    2.  Control Access


  • Designate a single entry point for workers and deliveries.


  • Keep keys or codes secure - never leave gates open for convenience.


  3.  Manage Hazards Inside


  • Ensure trip hazards, trailing cables, and exposed nails are dealt with promptly.


  • Store tools, materials, and chemicals safely at the end of each day.


  • Keep fire extinguishers and first-aid kits on-site and visible.


4.  Protect Your Family


  • Create a physical barrier between living areas and the works.


  • Use dust sheets and sealed doors to reduce airborne particles.


  • If you must enter the site, wear sturdy footwear and appropriate PPE.


5.  Meet Your CDM Duties


  • Appoint a Principal Contractor (if more than one contractor is working on-site).


  • Make sure the contractor has a Construction Phase Plan covering safety procedures.


  • Provide the contractor with any relevant information about the site (e.g., asbestos surveys, existing hazards).


Case Studies: When Safety Was Overlooked


  • Unsecured Front Garden: A London homeowner started a front extension without hoarding. Local children wandered in and damaged materials, leading to a council inspection and two weeks’ delay.


  • Open Cellar Drop: In Harrow, a basement staircase opening was left uncovered. A delivery driver fell in, breaking his leg. The homeowner’s insurance only partially covered the claim.


  • Dust Issue: A Middlesex extension lacked dust barriers. Cutting concrete indoors triggered an asthma attack in a child, halting the project until dust control measures were installed.


  • Driveway Hazard: In Watford, a loose scaffold plank fell onto a neighbour’s car during high winds. The builder’s insurance paid for repairs, but the homeowner faced weeks of disruption.


Each of these could have been avoided with basic safety measures in place from the start.


Take Control of Safety from Day One


Your home improvement project should bring you joy - not stress or legal problems. Putting safety first protects your investment, your family, and your peace of mind.


Book a free 20-minute consultation with The Building Guidance Partnership today to ensure your project meets all safety requirements from the start.


Sunil K Radi

The Building Guidance Partnership

Telephone (020) 8076 3110

WhatsApp +44 7507 705376

www.theBGP.co.uk 


by Niket Kapur 3 August 2025
When embarking on a building project, most homeowners are full of enthusiasm. Ideas flow freely, budgets are roughly sketched, and builders are often keen to “get started quickly”. Yet this excitement can lead to one of the costliest mistakes: starting work without a clear, written specification. A vague scope is an open invitation for overruns, disputes, and disappointment. In contrast, a well‑prepared specification acts like a roadmap - it keeps everyone aligned, avoids unnecessary delays, and ensures your project delivers exactly what you had in mind. Why a Watertight Specification Matters A proper specification sets out exactly what you want done, how it should be done, and under what conditions. It is not just a rough outline or a mood board. It is detailed, definitive, and written in plain, simple English so that all parties - from the builder to the homeowner - know where they stand. Your specification should: Define non‑negotiables - the features or outcomes you will not compromise on. Set a realistic budget and upper financial limits. Provide a clear timeline with allowances for known delays or breaks. Clarify responsibilities - who is supplying what, and who is managing each stage. Builders rely on clear instructions. If there is any ambiguity, you are exposed to those frustrating extras, delays, or quality compromises - all of which could have been avoided. Practical Steps to Build Your Specification Start with Your Priorities : Think carefully about function, flow, and finish. What must the space achieve? Create a Room-by-Room Breakdown : Note finishes, fittings, lighting, heating, and special requirements. Define the Budget with Contingency : Be realistic and include a margin for the unexpected. Describe the Sequence of Works : Especially useful where multiple trades are involved. Clarify Material Choices : If you want specific tiles, switches, or joinery, state them upfront. Also seek advice and specify construction material choices.  Keep It in Writing : Do not rely on verbal agreements or casual WhatsApp messages. Everything must be formalised. Case Study: Clarity Prevented a Costly Dispute At The BGP, we were approached by a family part-way through a large extension. The builder had been given broad instructions, and as work progressed, disagreements over finishes, layout changes, and payment expectations quickly emerged. We stepped in and helped the homeowner prepare a comprehensive written specification. This reset the tone and expectations on site. Disputes reduced, the builder had clearer direction, and the homeowner regained control — avoiding nearly £15,000 in disputed extras. Take Control of Your Project A clear, definitive specification is your best defence against spiralling costs, disputes, and disappointment. It protects your investment and gives your contractor a professional standard to follow. Book a free 20‑minute consultation with us today to discuss how we can help you create or review your project specification. It could be the most valuable step you take in your renovation journey. The Building Guidance Partnership – www.thebgp.co.uk Tel: 020 8076 3110 Whatsapp: 07956 822088
by Niket Kapur 21 June 2025
The body content of your post goes here. To edit this text, click on it and delete this default text and start typing your own or paste your own from a different source.
by Niket Kapur 28 April 2025
Introduction Insulating your home’s external walls – whether from the outside (external insulation) or from the inside (internal insulation) – can dramatically reduce heat loss, improve comfort, and make your home more energy efficient. This guide provides a detailed, practical explanation of external wall insulation (EWI), internal wall insulation (IWI), and hybrid approaches, covering types of materials, finishes, installation methods, and key considerations for homeowners. Why Insulate Your External Walls? Lower Energy Bills Proper insulation significantly reduces the amount of heat escaping from your home, lowering your heating costs by hundreds of pounds annually. Improved Comfort Insulated walls eliminate cold spots and draughts, maintaining an even, comfortable temperature throughout your home. Protection Against Damp and Mould Keeping masonry walls warmer reduces the risk of condensation and mould formation. Breathable insulation systems can further protect against moisture issues. Enhancing Appearance External wall insulation often refreshes the external look of a property, allowing for new finishes like renders or brick slips. Increasing Property Value Energy-efficient homes are increasingly desirable. Improved EPC ratings and enhanced aesthetics can add value. Soundproofing and Fire Safety Certain materials, such as mineral wool, provide excellent soundproofing and fire resistance. Preparing for Future Heating Systems With the rise of low-temperature heating systems like heat pumps, a well-insulated home is crucial for efficiency and comfort. External vs Internal Wall Insulation: An Overview External Wall Insulation (EWI) Applied to the outside of the home. No internal disruption. Preserves indoor space. Refreshes external appearance. Requires scaffolding and possible planning considerations. Internal Wall Insulation (IWI) Applied to the inside walls. Can be installed room-by-room. Reduces internal space slightly. Preserves external appearance. Requires redecoration and careful moisture management. Hybrid Approach Combines external insulation where possible and internal where necessary. Useful for heritage properties or conservation areas. Also useful where area close to external wall is restricted size for example a shared walkway. External Wall Insulation (EWI) How It Works Insulation boards (e.g., EPS, mineral wool, phenolic) are fixed to external walls, covered with reinforcement mesh and finished with render, brick slips, or cladding. Benefits Eliminates thermal bridging. Protects the existing structure. Greatly improves thermal performance. Access and Planning Scaffolding needed. Planning permission may be required, especially in conservation areas. Structural Considerations Walls must be sound. Damp-proof course must be respected. Common Insulation Materials for EWI Expanded Polystyrene (EPS) Affordable, lightweight, good insulation value. Fire risk: must be rendered and protected. Mineral Wool Non-combustible, breathable, excellent fire and acoustic performance. Heavier and more expensive than EPS. Phenolic and PIR Boards High insulation values (thin boards). Moderately fire-resistant but combustible. Wood Fibre Breathable, eco-friendly. Requires thicker applications and careful detailing. Finishes for External Insulation Render Acrylic, silicone, or mineral renders. Range of colours and textures. Brick Slips Thin slices of real brick. Maintain traditional appearances. Acrylic faux brick often used. Cladding Timber, composite, or metal finishes. Installed on battens with ventilated cavities. Mixing Finishes Common to combine finishes (e.g., render with brick slips for front facades). Installation Process for External Wall Insulation Survey and preparation. 2. Fixing insulation boards. 3. Applying reinforcement mesh and basecoat. 4. Applying the final finish (render, brick slips, cladding). 5. Refixing external fixtures (pipes, lights, alarms). 6. Final inspection and handover. Internal Wall Insulation (IWI) How It Works Insulation is added to the internal face of external walls, finished with plasterboard. Suitable Situations Where external changes are prohibited. Room-by-room renovations. Types Rigid insulated plasterboards. Stud wall systems with mineral wool or PIR infill. Moisture Management Vapour barriers or breathable materials essential to prevent condensation. Installation Process for Internal Insulation Clear and prepare rooms. 2. Apply insulation (dot-and-dab, mechanical fixings, or stud walls). 3. Install vapour barriers if needed. 4. Finish with plasterboard and skim. 5. Redecorate and refit fixtures. Combining External and Internal Insulation (Hybrid Approach) When Appropriate Conservation areas. Tight boundaries. Specific aesthetic requirements. Advantages Maximises insulation coverage. Preserves important facades. Challenges Careful design at junctions. Moisture management essential. Comparing Insulation Options Summary Table EWI with EPS Key benefits: Cost-effective, good thermal performance Drawbacks: Fire risk if not detailed correctly EWI with Mineral Wool Key benefits: Non-combustible, breathable Drawbacks: More expensive and heavier EWI with Phenolic/PIR Key benefits: Very thin, excellent insulation Drawbacks: Combustible, costlier EWI with Wood Fibre Key benefits: Breathable, eco-friendly Drawbacks: Thicker walls, specialist installation Internal Wall Insulation Key benefits: Maintains external appearance, can be phased Drawbacks: Reduces room size, condensation risk Hybrid Key benefits: Best performance + appearance Drawbacks: Complex design, higher initial cost Conclusion: The Importance of Proper Wall Insulation Wall insulation is vital for reducing heat loss, cutting energy bills, improving comfort, and futureproofing homes against rising energy costs and regulatory changes. It is especially critical when installing low-temperature heating systems like heat pumps , which work most efficiently in well-insulated homes. Without adequate insulation, a heat pump may struggle to maintain temperatures and may consume more electricity than necessary. Done properly, wall insulation (external, internal, or hybrid) is a one-off investment that will enhance your home’s warmth, value, and energy efficiency for decades to come. Always engage qualified professionals, ensure certified systems are used, and address moisture management carefully. With the right approach, your home will be more comfortable, greener, and ready for the future. And finally … This guide is for general installation. Do rely only on your specialist adviser’s and installers. Each site is unique. The Building Guidance Partnership www.thebgp.co.uk +44 (0)20 8076 3110